Import from Postman
Video Tutorial
Conceptual Mapping
Collection corresponds to a Project in Apidog. Thus, variables within a Postman Collection are equivalent to global variables in an Apidog project.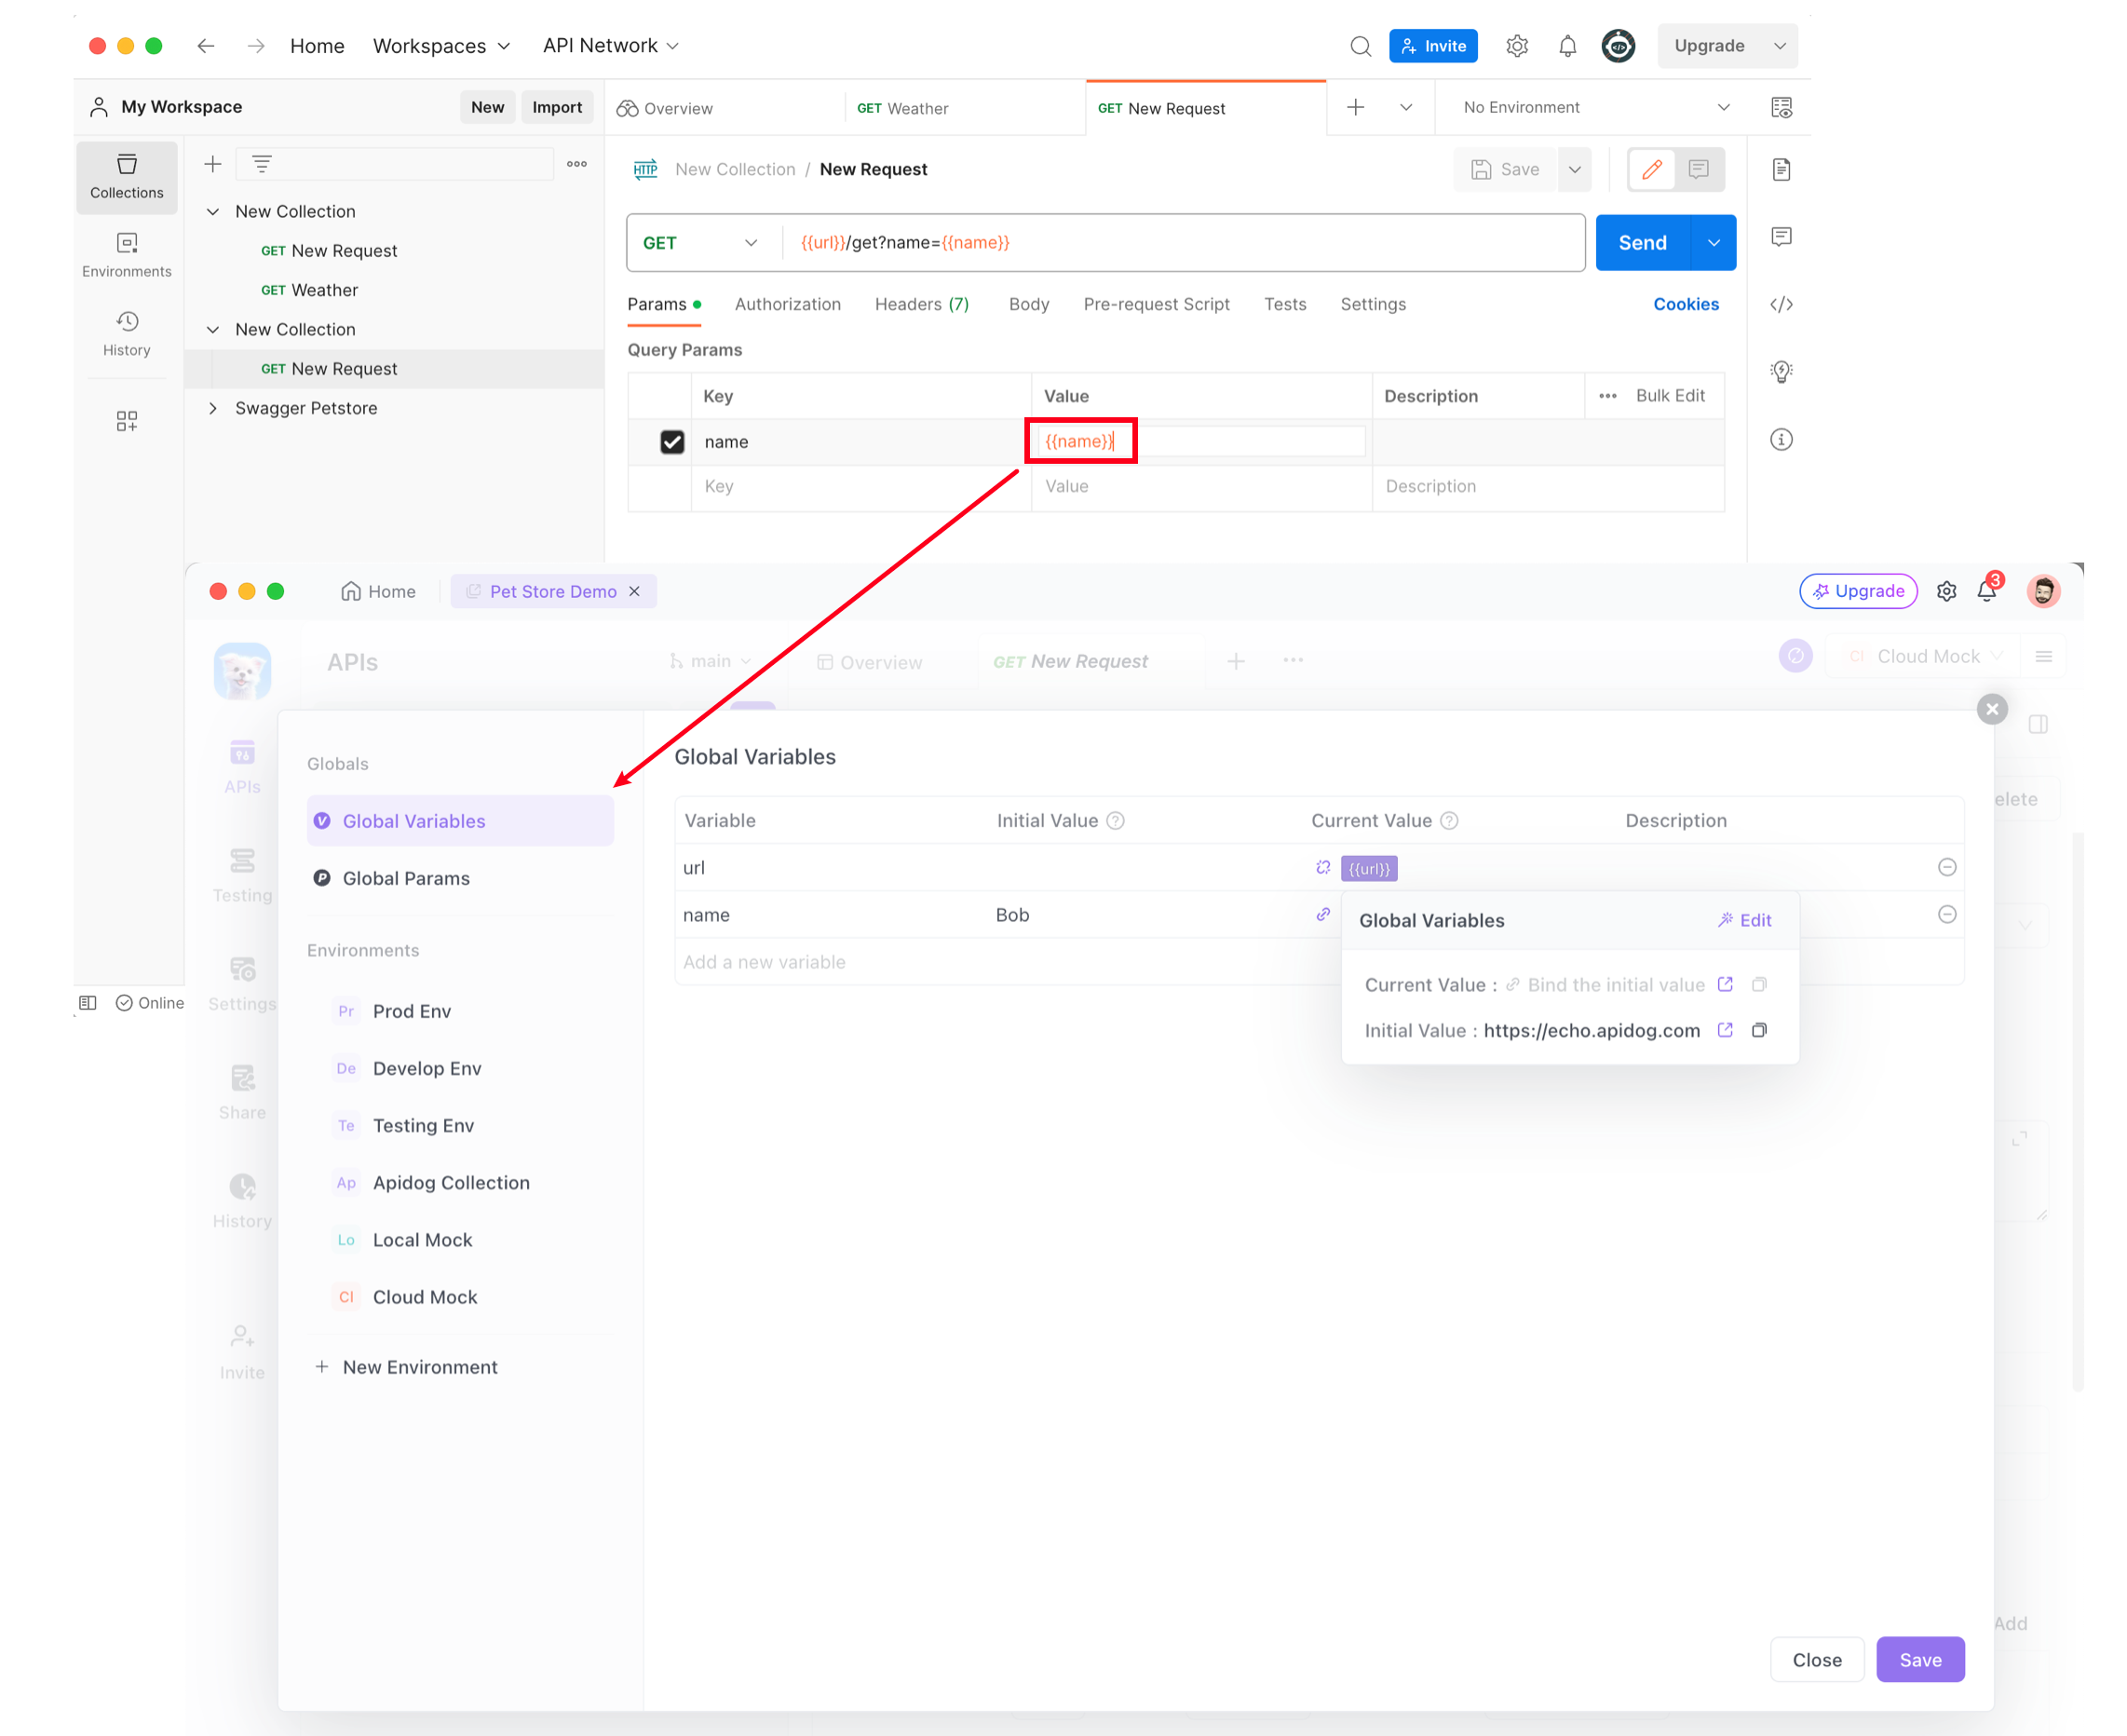
Service in Environment Management.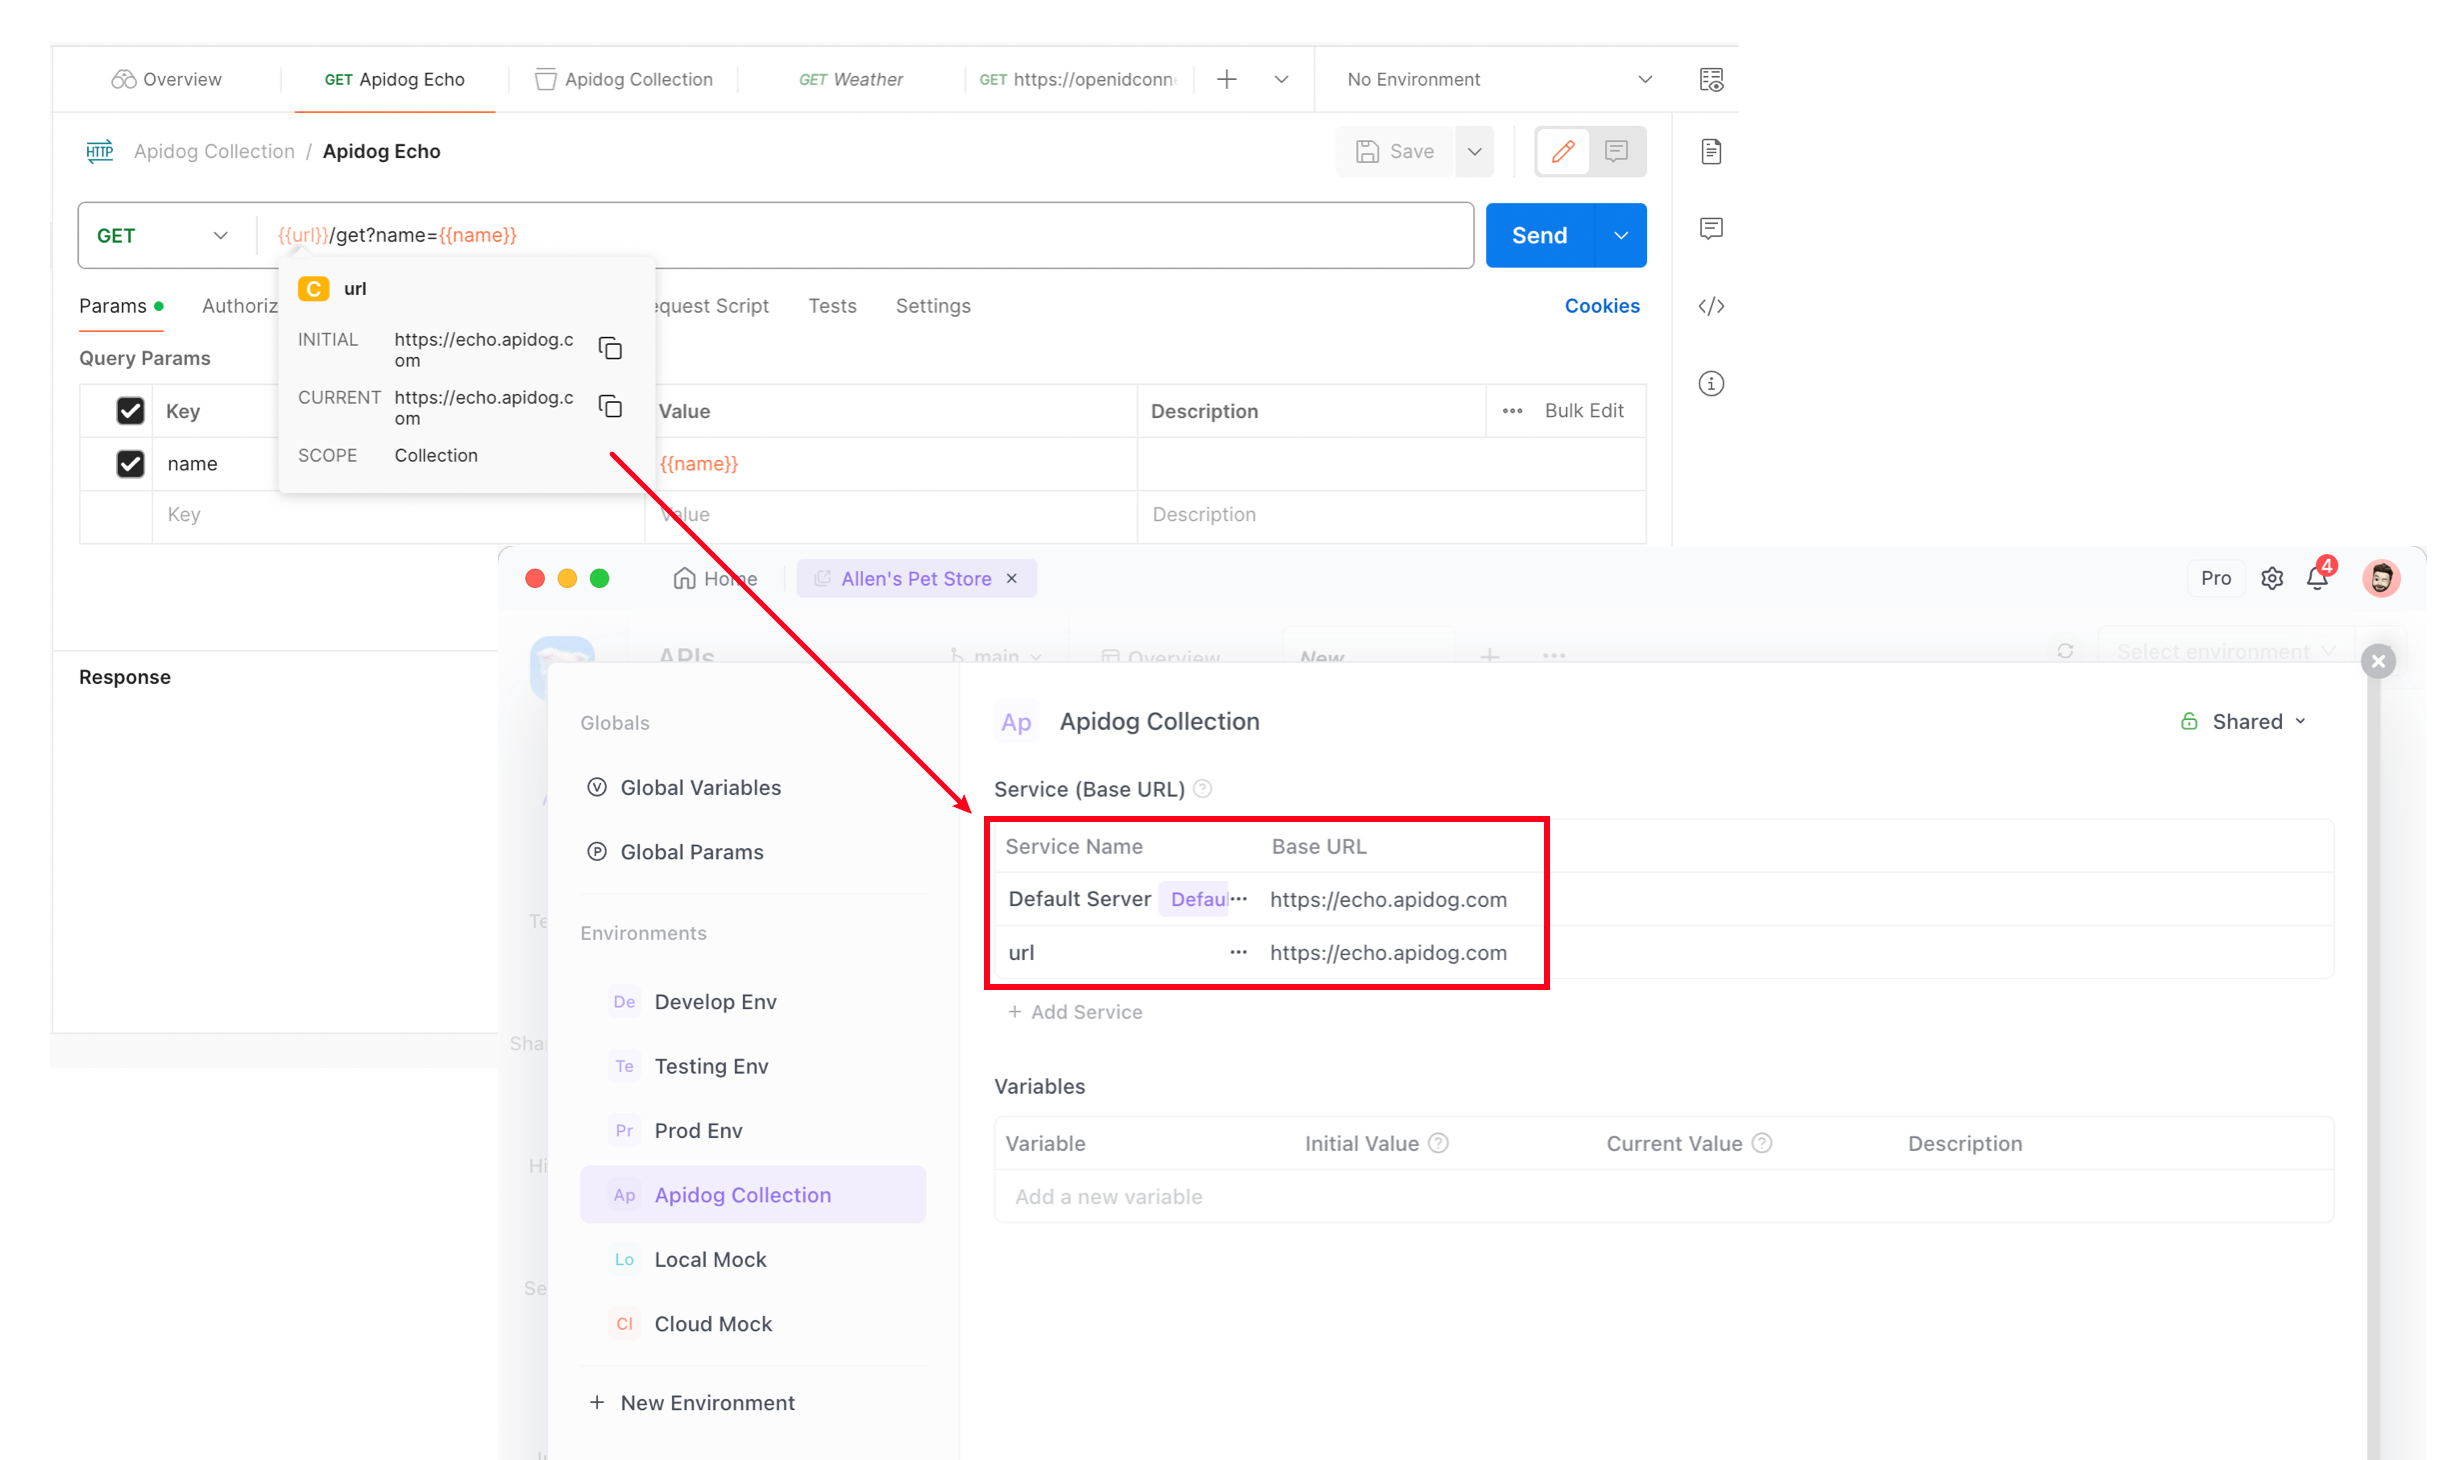
Example
Collection named Apidog Echo, which contains two variables:baseUrl: defines the service addressname: used as a query parameter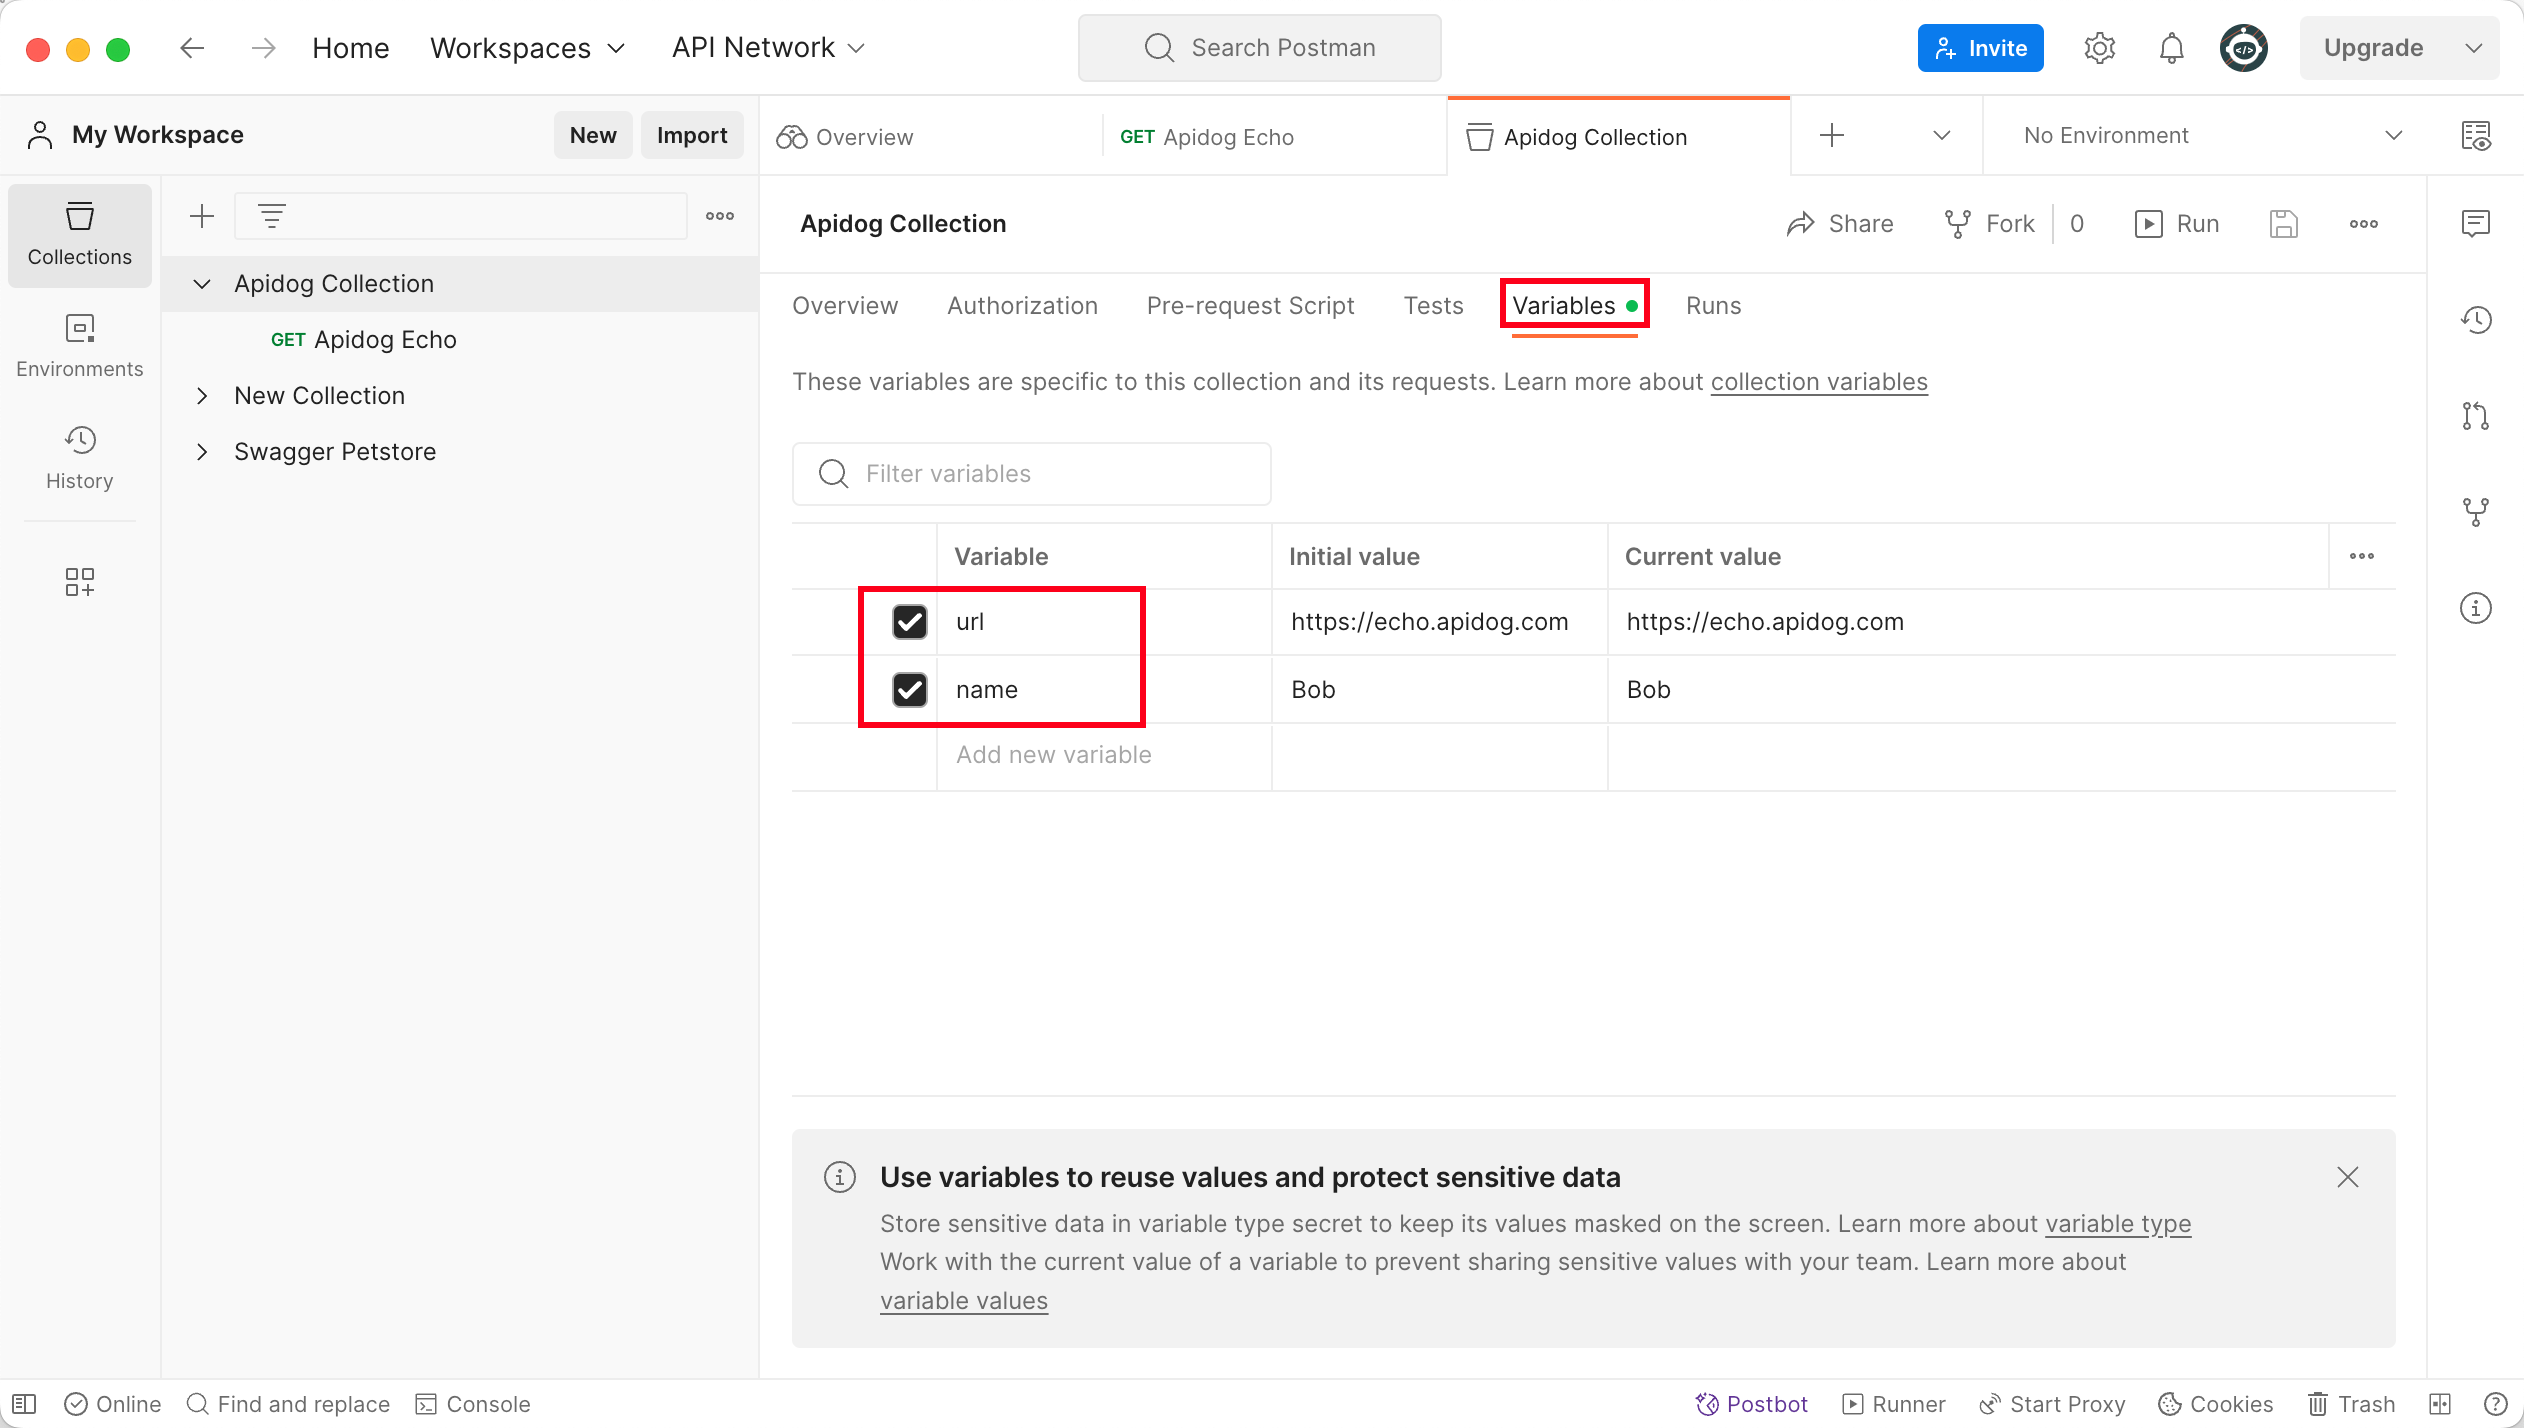
Collection has a GET request:If you already have a Collection in Postman, feel free to use that instead — no need to start from scratch.
How to Export Data from Postman?
Exporting a Collection
Open Collections on the left sidebar of Postman
Mouse over the collection to export, click the 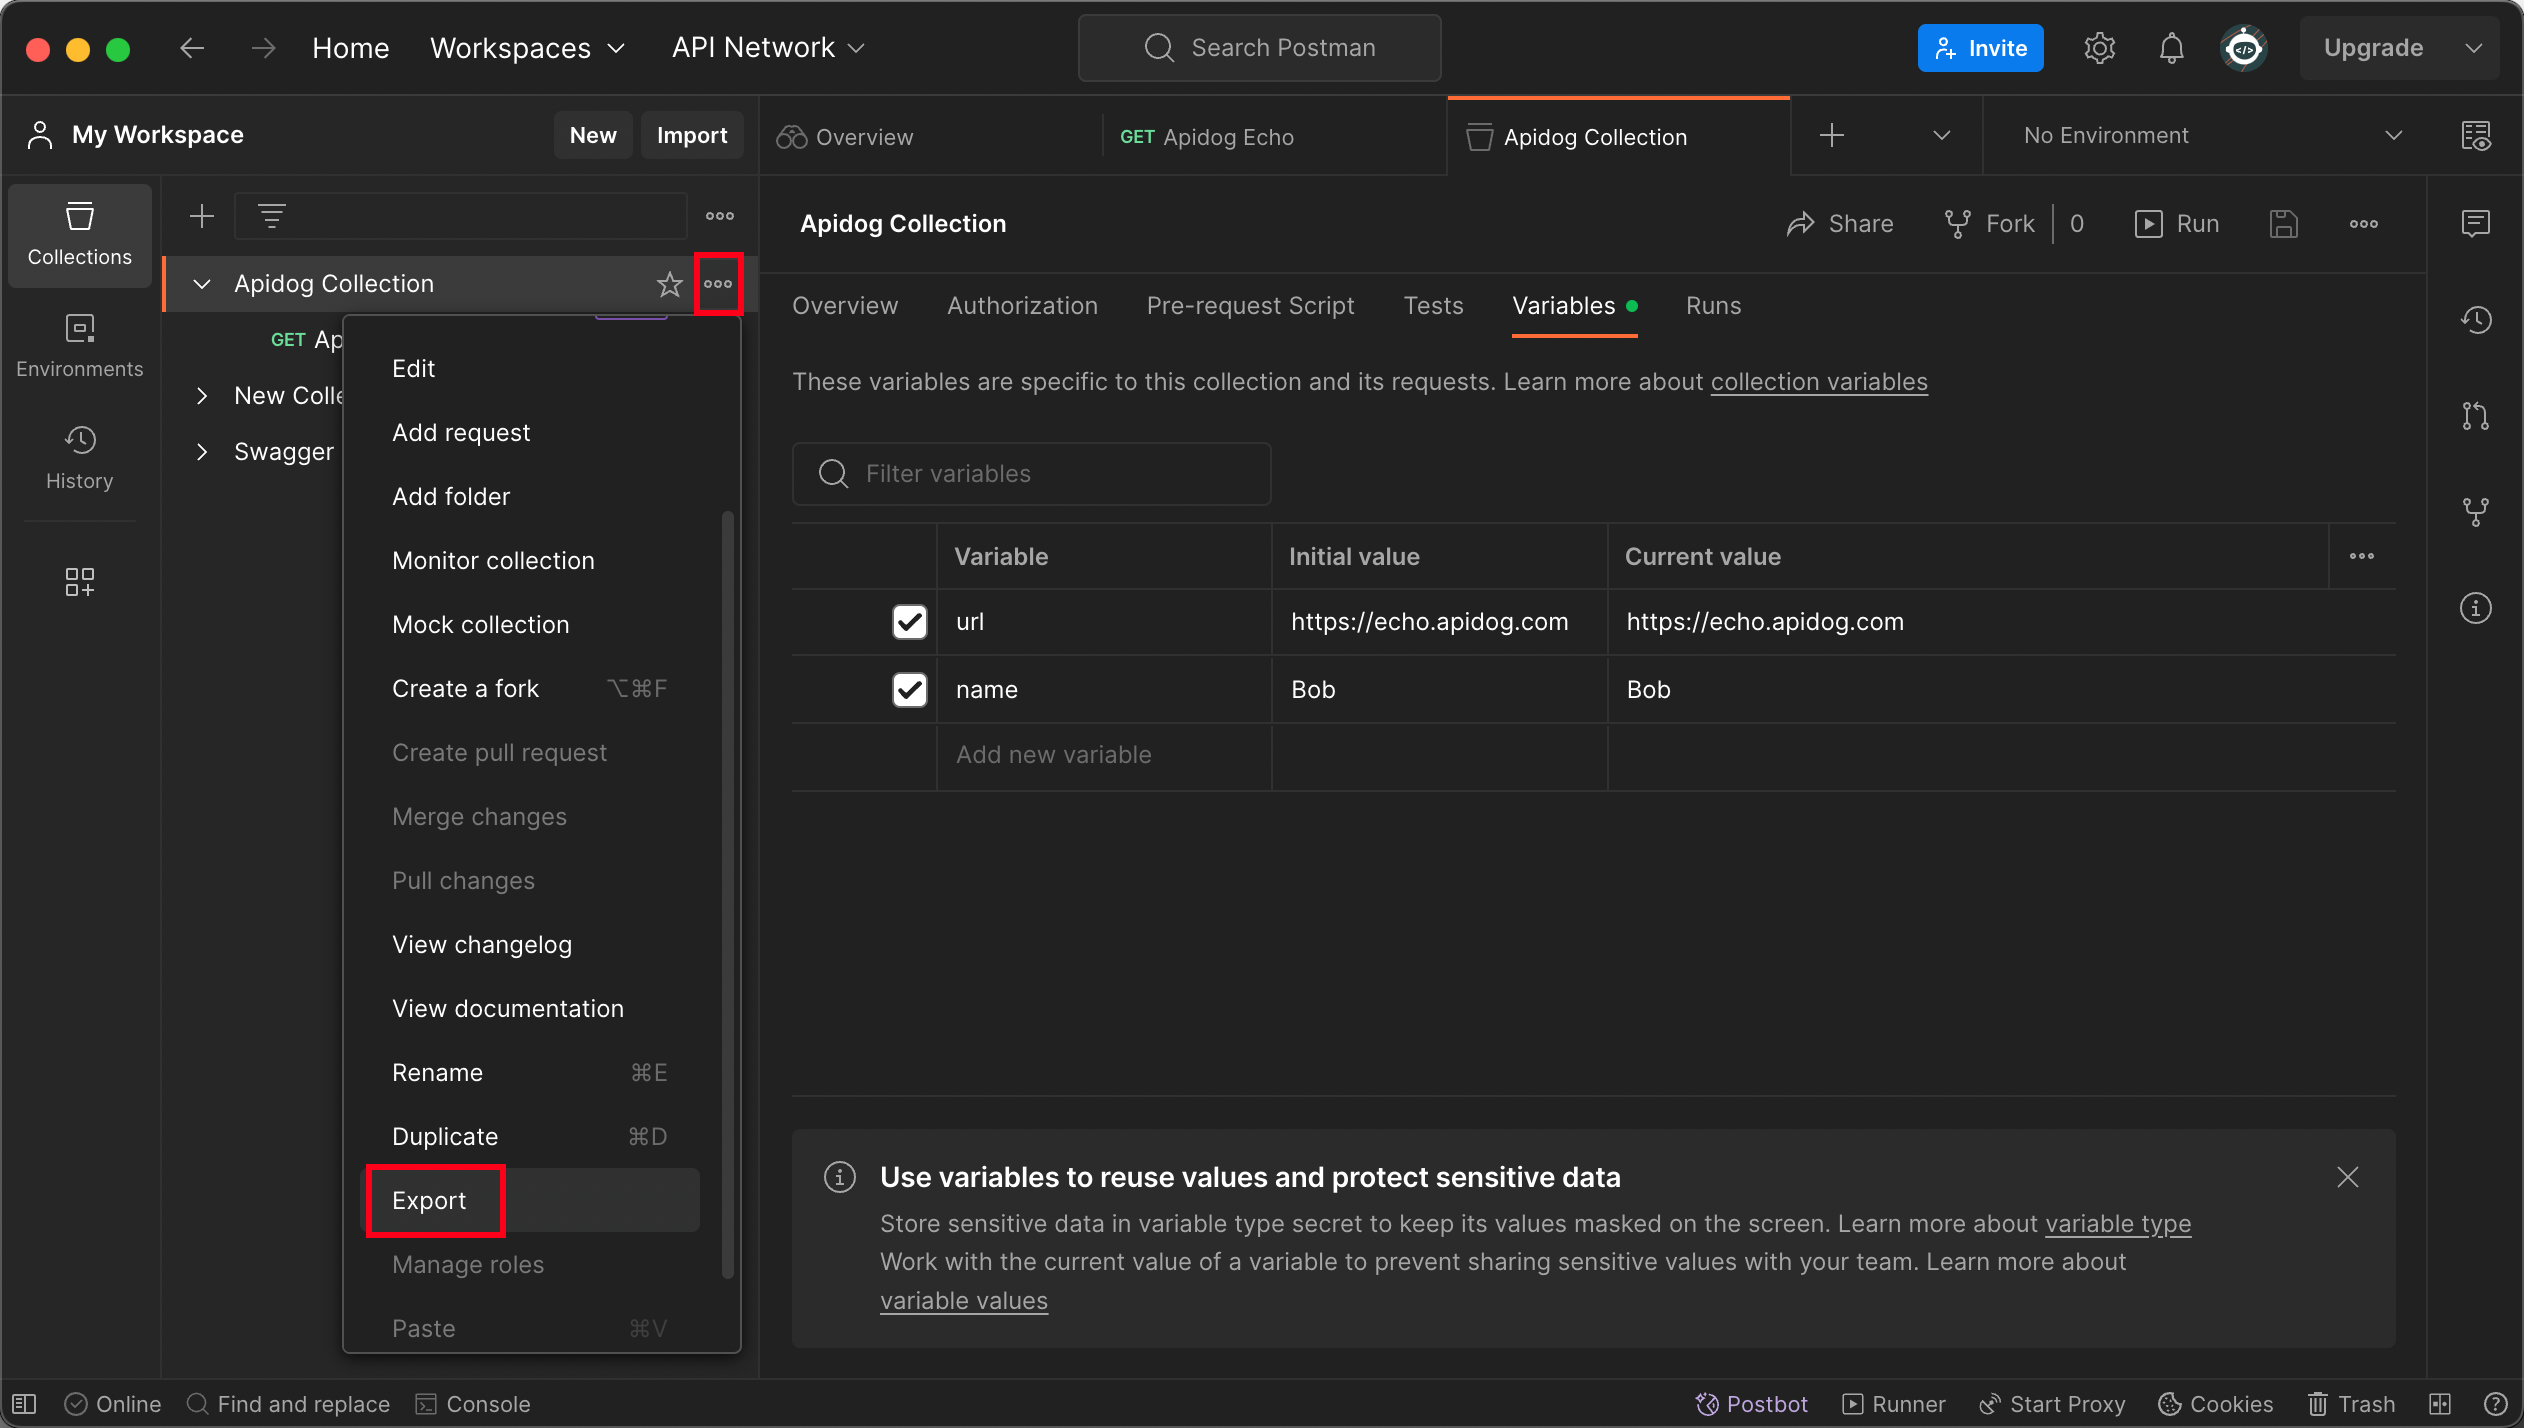
... icon, and select ExportIn the pop-up window, choose the export format as Collection v2.1.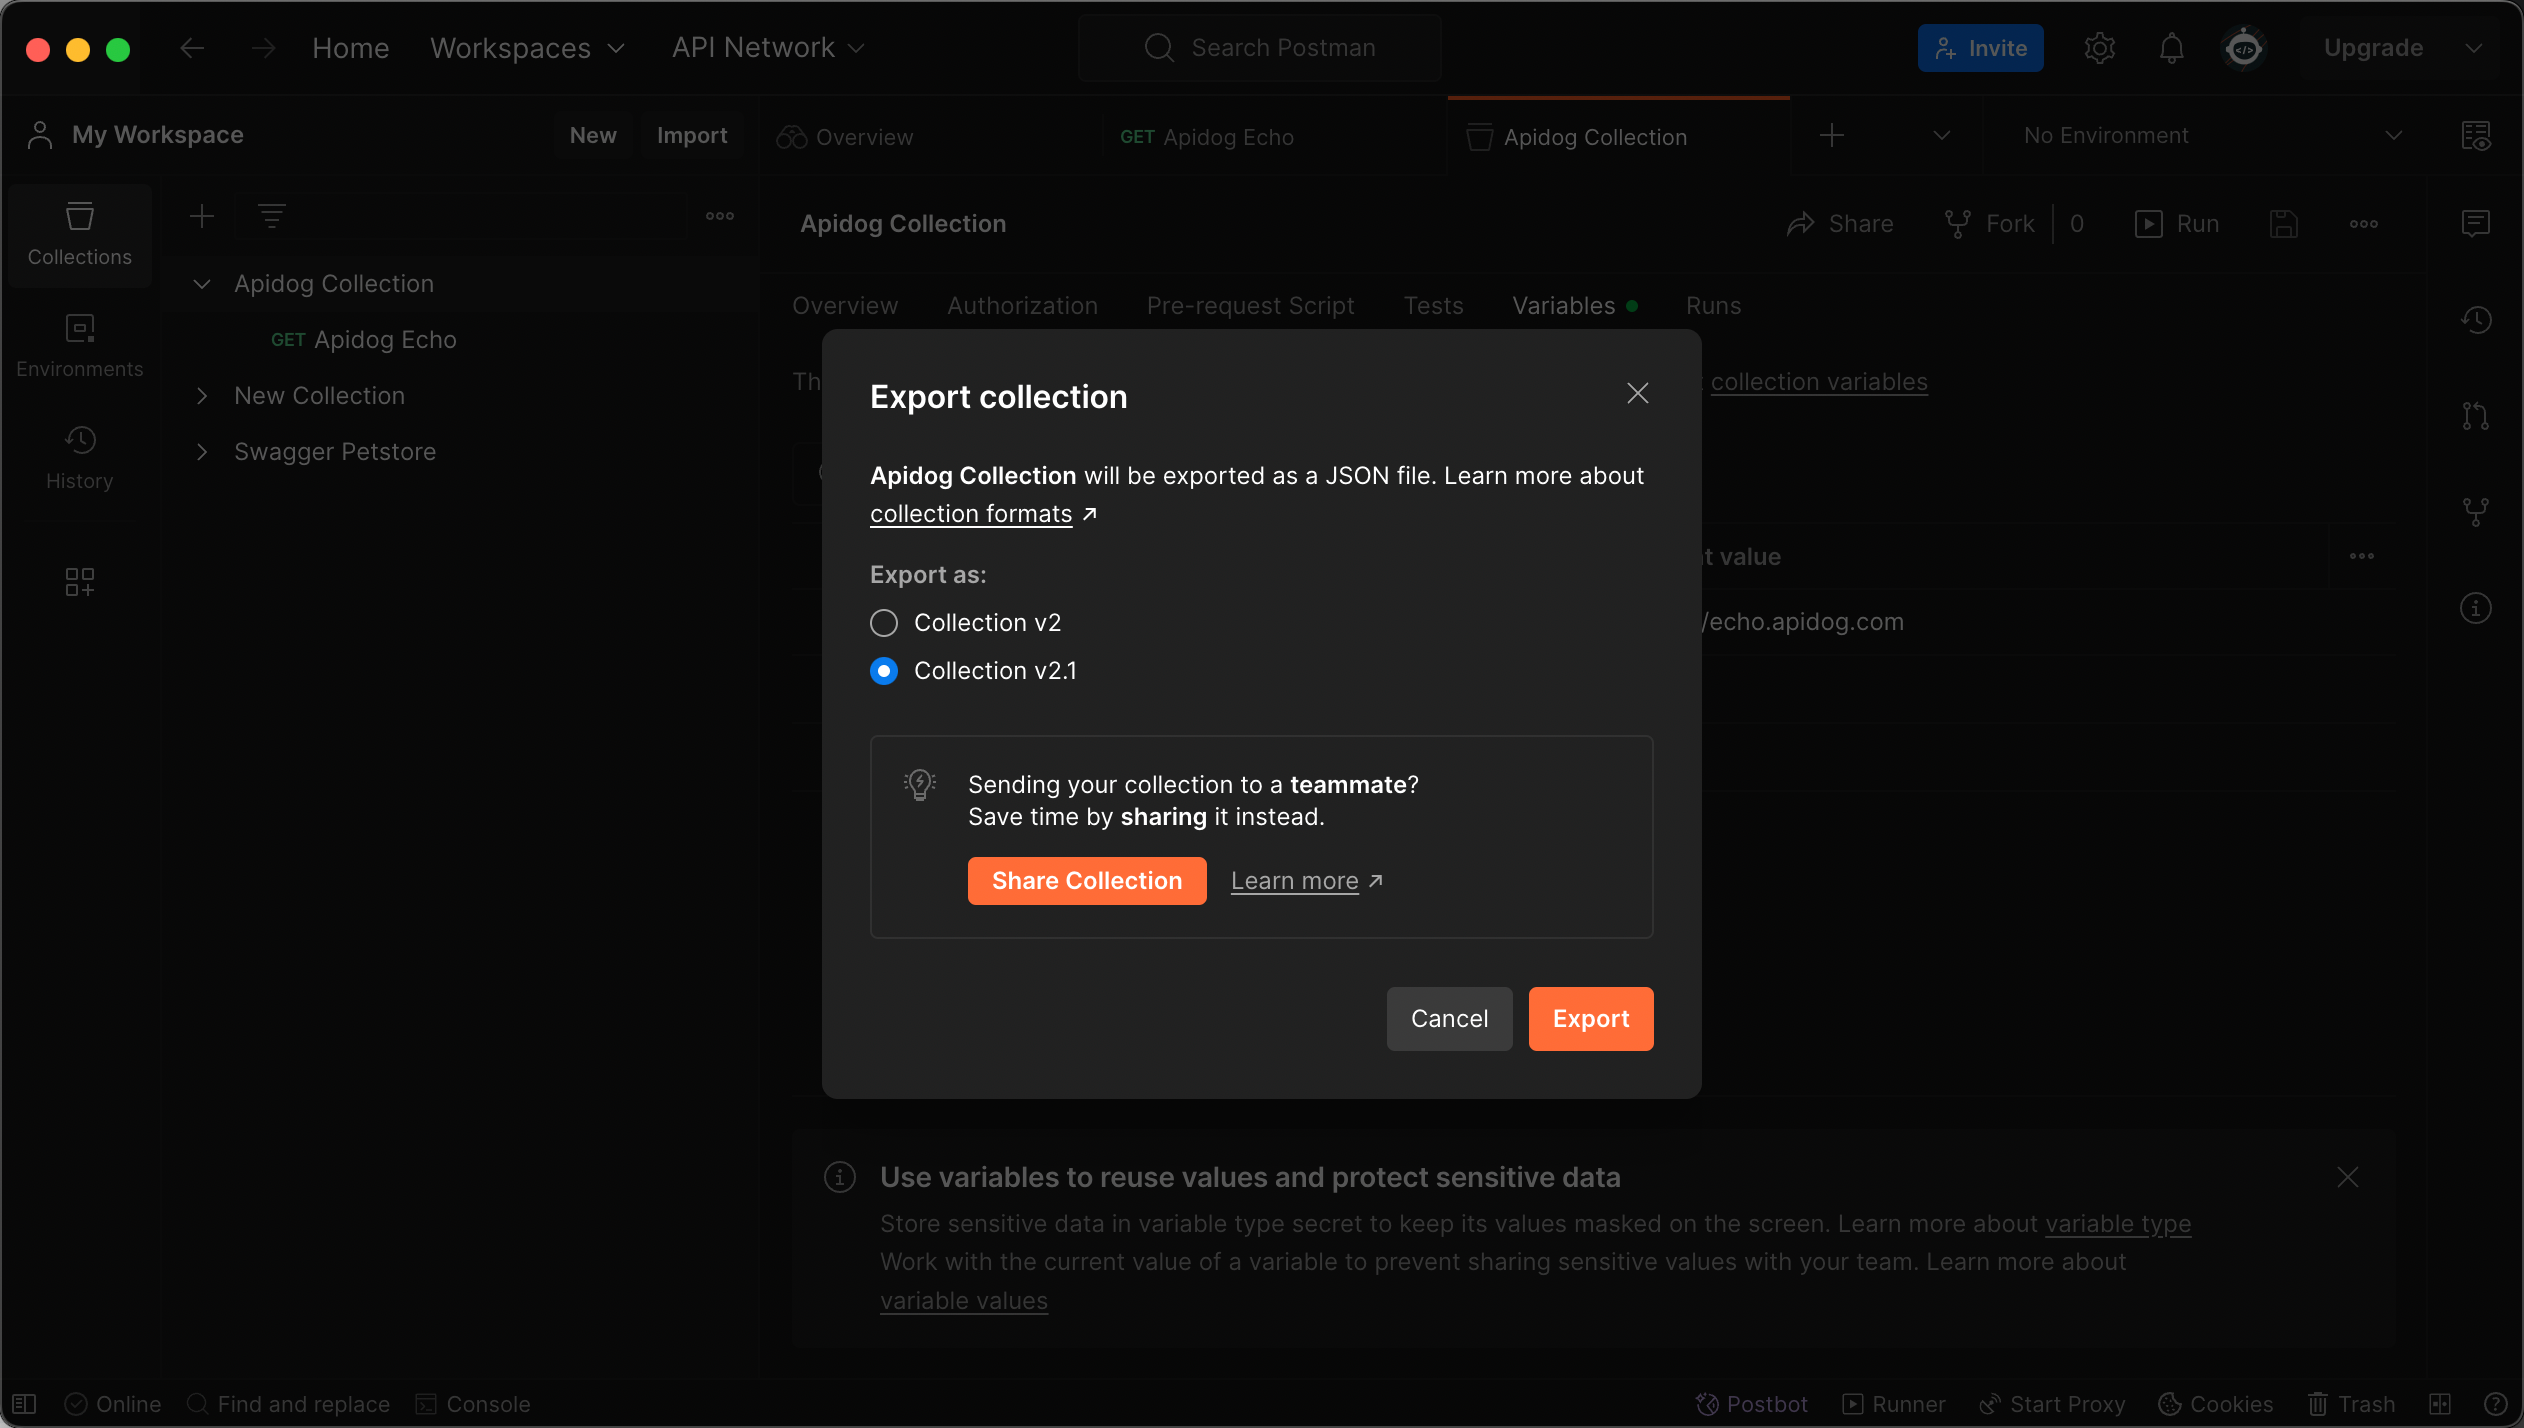
Click Export, then save the file to your computer as a
.json file.Exporting an Environment (Optional)
Open the
Environments tab from the left sidebar.Locate the environment you want to export, click
···, then select Export.Save the environment as a
.json file.Exporting Workspace Data (Data Dump) – Optional
.json file.Select your avatar in the Postman header, then select
Settings.Select the
Account tab.Select
Export Data, then select the data types you want to export (like collections, environments,etc.)Select
Request Data Export.When the export is ready, you'll get an email with a link to download the bulk data file. The download will be available for two days, after which it expires.
Note
How to Import Postman Data into Apidog?
Importing a Collection
Project Settings panel in Apidog, click Import Data, select Postman, and upload your file.Collection on the import preview page. To seamlessly migrate, you need to check the environment with the same name as the Collection on the Environment tab, and then click the Confirm button.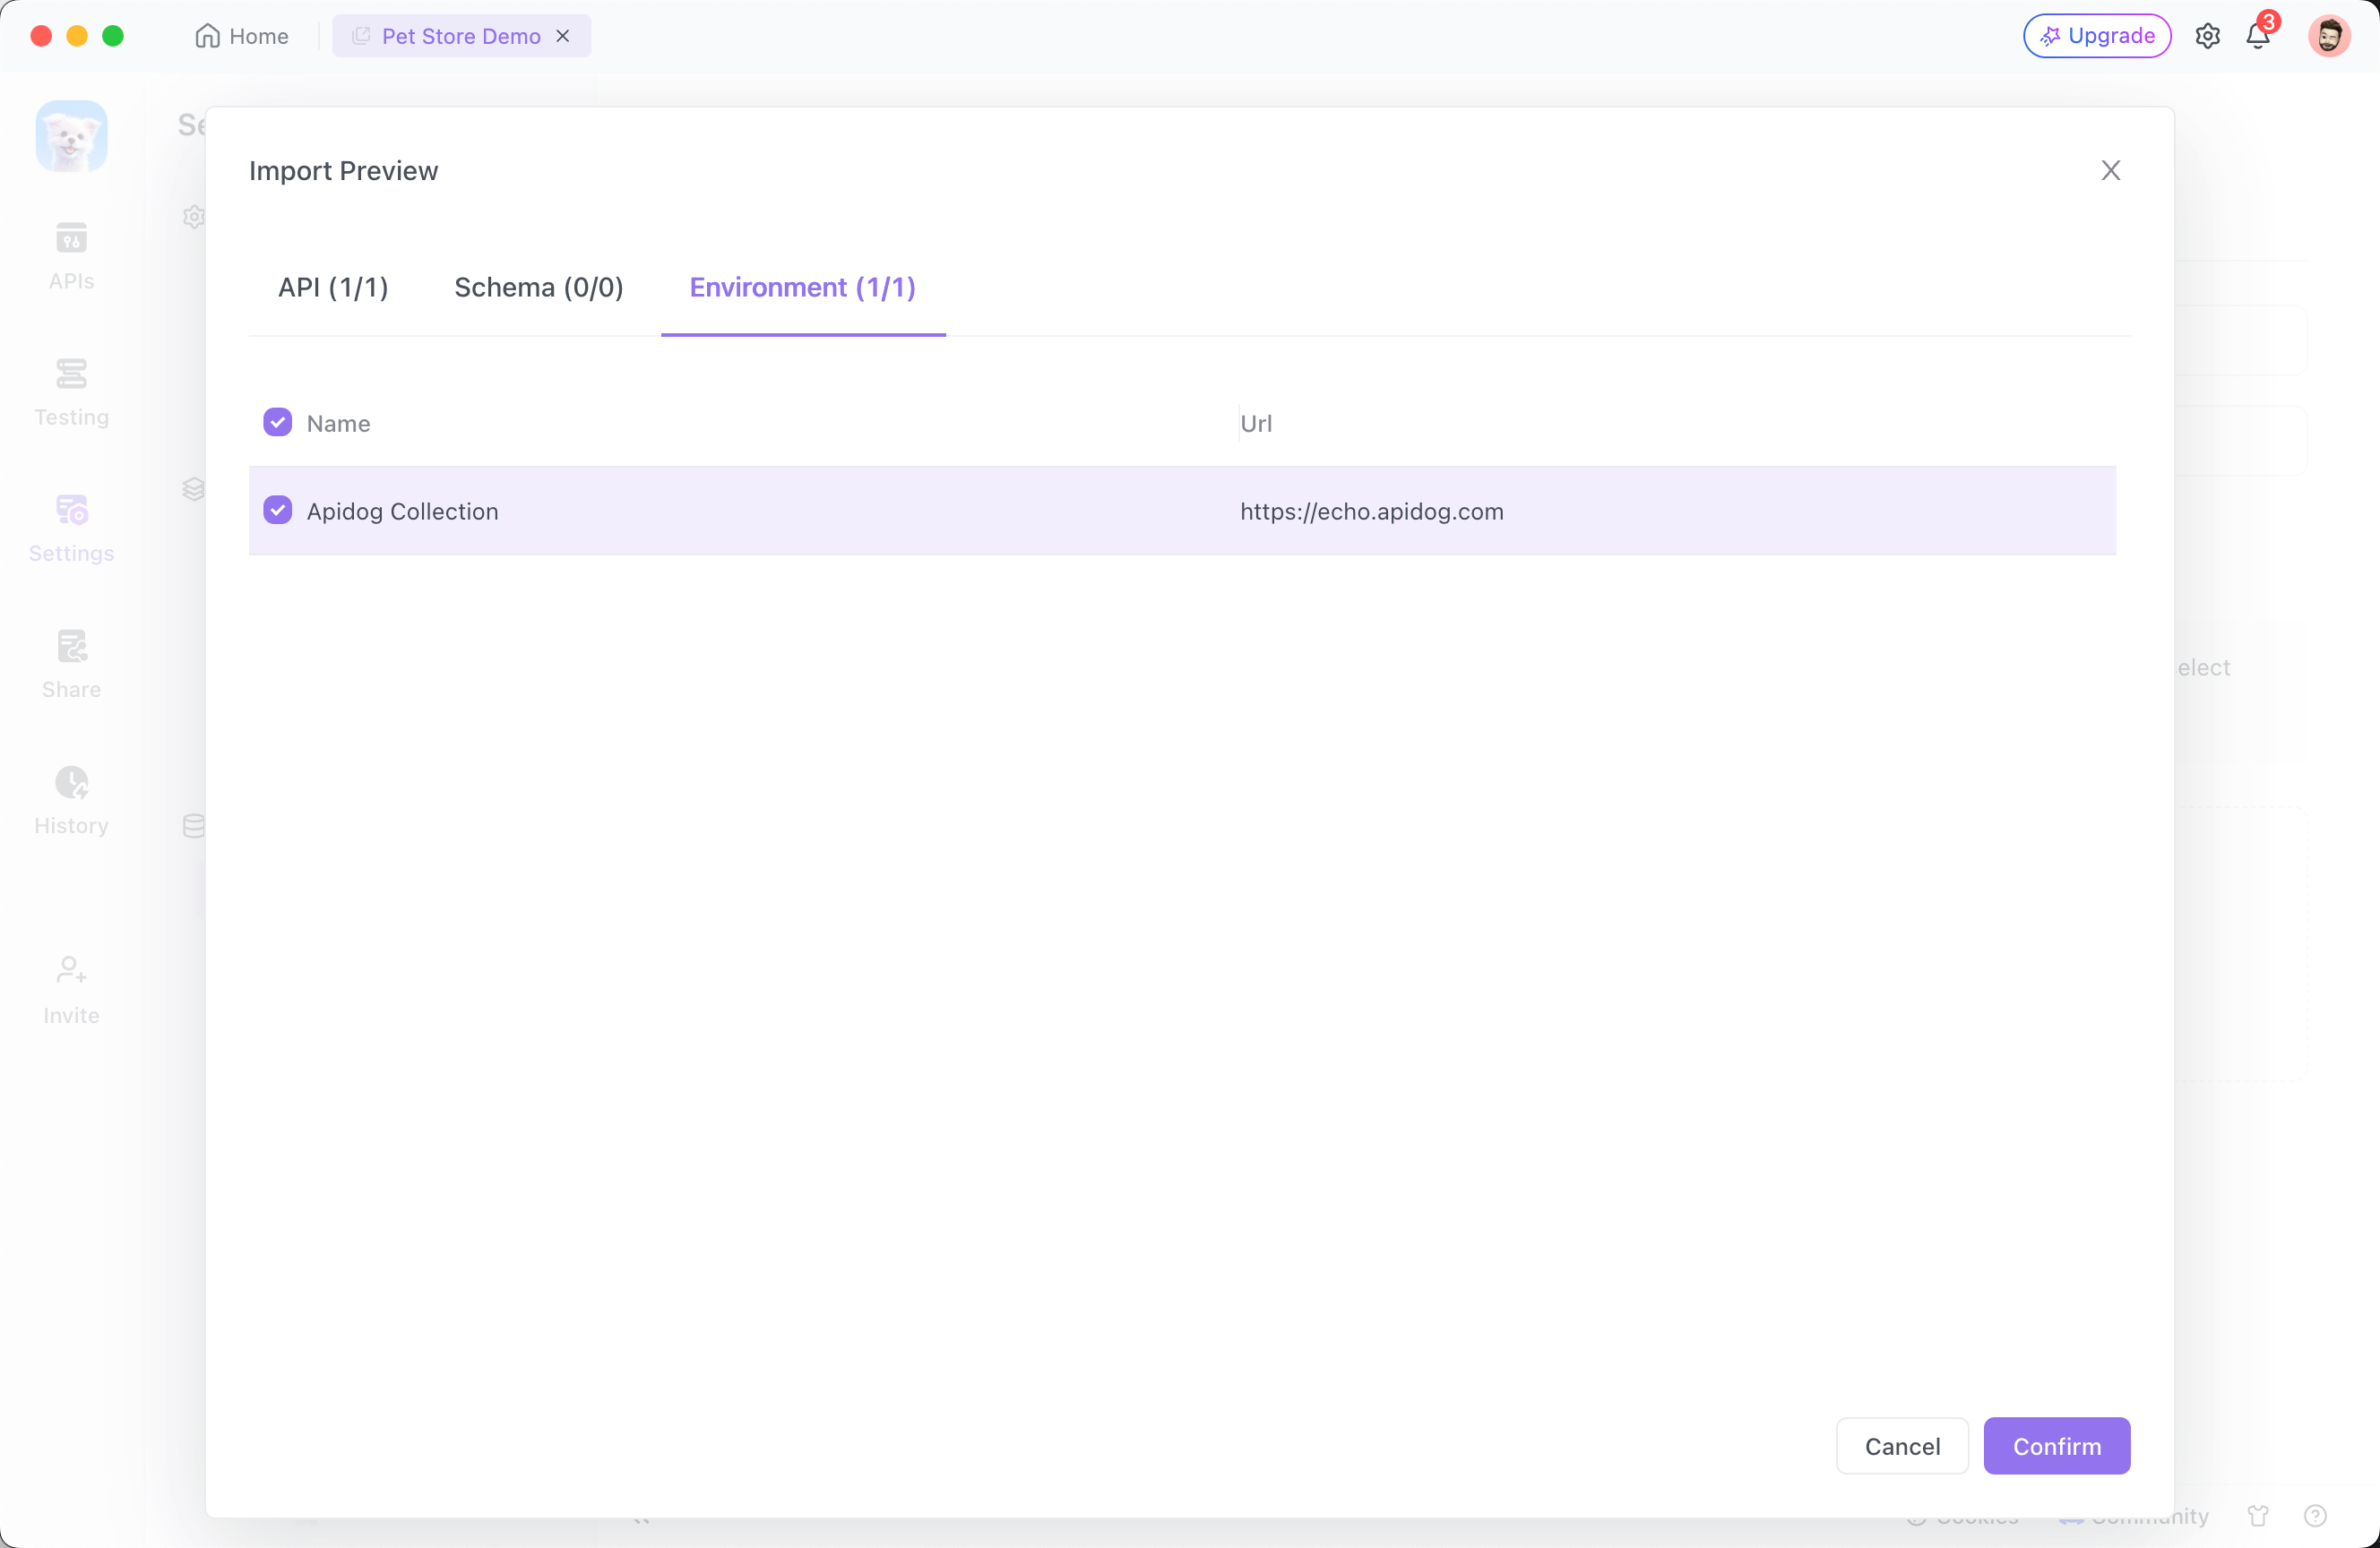
name parameter on the API documentation and the link address in baseUrl in Environment Management section.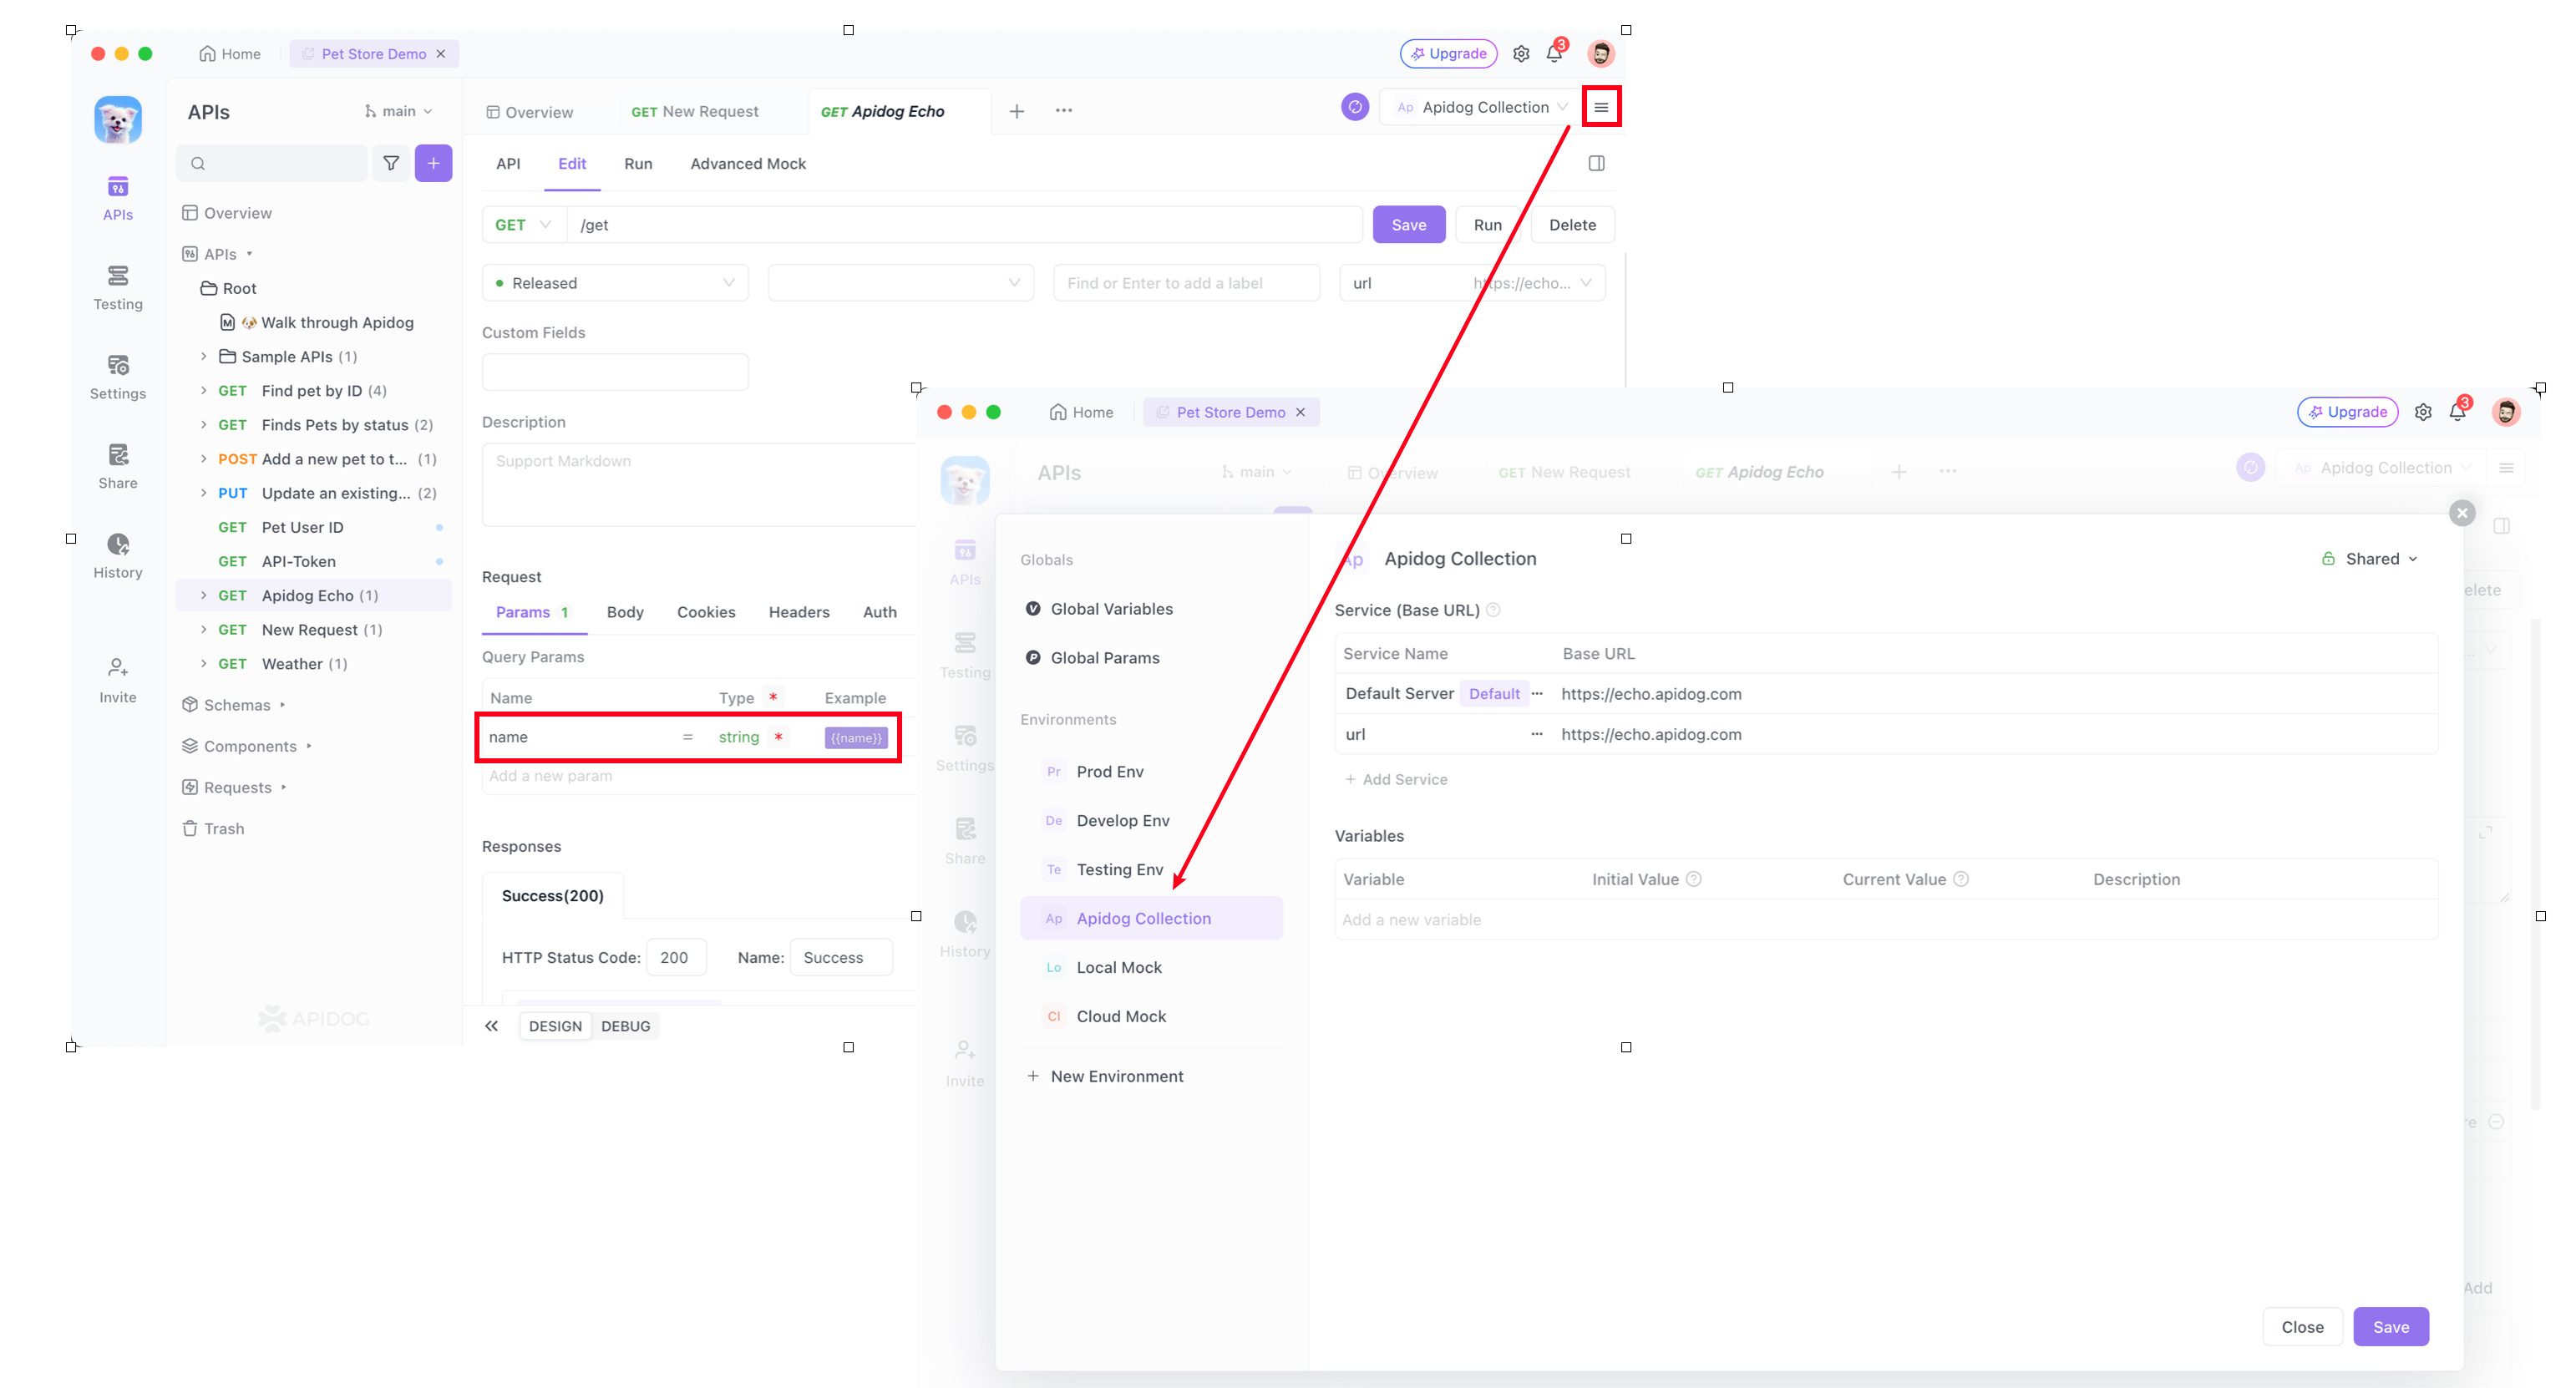

Importing an Environment (Optional)
In Apidog, go to your
Project Settings → Import Data.Choose Postman, then upload the exported Postman Environment
.json file.After importing, you can switch to the corresponding environment during endpoint debugging.
Importing Workspace Data/Data Dumps (Optional)
In Apidog, go to your
Project Settings → Import Data.Choose Postman, then upload the extracted files or folders.
After importing, you can switch to the corresponding environment during endpoint debugging. (Currently, Collection only supports selecting one.)
Using Data Dump for data migration is currently not recommended. Instead, we suggest importing the following separately:Collection: Corresponds to the project and endpoint structure in Apidog Environment: Corresponds to the environment configuration in Apidog
Modified at 2025-04-18 07:53:08